Onboarding is a vital step in supporting new employees to settle into an organization.
An onboarding checklist is a tool used in that process; it helps to:
- Capture what tasks need to be carried out
- Act as a place to record information about the new hire
- Provide a status of what’s been done and what is outstanding.
In today’s article, we’ll look at how to create an onboarding checklist template. We’ll be using Excel to create our template.
We’ll take you through three different onboarding examples to provide an insight into the different approaches you can take when creating your own template.
In this article, we’ll show you:
- What is onboarding?
- Common contents of an onboarding checklist
- How to create an onboarding checklist in Excel
- Onboarding Checklist Example 1
- Onboarding Checklist Example 2
- Onboarding Checklist Example 3
- Why should you use an onboarding checklist?
OK, let’s make a start.
What is onboarding?
Onboarding is a process undertaken when bringing a new hire into an organization.
The Human Resources function typically undertakes it:
Onboarding has two primary goals:
a) To help new employees integrate into the organization
b) To help them become effective/productive as fast as possible.
The secondary goal may be driven by several facets, including:
- Ensuring awareness of colleagues and stakeholders
- Providing awareness of processes and policies
- Equipping new starters with appropriate tools
Common contents of an onboarding checklist
Before you start creating your checklist, it’s a good idea that you spend some time thinking about what activities you’ll use the list to manage.
While there may be some standard tasks (such as obtaining an ID badge), every business is different. You may have some activities that will be specific to your company.
As a result, I would avoid copying the contents from something you find online but think about what aspects might be unique to your organization.
For the more common tasks, onboarding an employee usually involves things like:
- Meeting colleagues
- Being shown their workstation
- Being briefed on key policies (i.e., Security)
- Getting to know the general location/office layout
- Getting to know where to find resources
- Being given equipment to help them do their job
- Being briefed on procedures and processes
- Being asked to provide information (i.e. contact details of next of kin for emergencies)
- Being informed of goals and objectives
- Having mandatory training
- etc
Remember that depending on what country or region/state you are in, there may be rules/legislation that you need to comply with about what information (personal or otherwise) you can keep on file about an individual- be sure to check this out before you start and make sure your process is compliant.
I would suggest that your process should be:
- Determine what format you want i.e. functional, time-based, or other.
- Discuss the process with your business’s functions; what information do they need to capture or discuss with a new hire?
- Discuss the process with recent hires within the company – what worked well for them, what didn’t work so well.
- Determine what you’ll do with the information that you capture.
How to create an onboarding checklist in Excel
Now you’re armed with an understanding of the onboarding process and some standard things to capture, let’s now look at three examples of an onboarding checklist template.
The three types we’ve chosen are:
- Form-based
- Time-based
- Function-based
We’ve used Microsoft Excel to create these checklists. You can get similar results using other packages, so use what you’re comfortable with.
If you’re using Excel, these don’t use any complex formulas; you’ll need to know some basic formatting skills. (i.e., adjusting row/column height/width’s, using the “fill color” tool, and how to apply borders to cells.
We’ve included several screenshots to help along the way.
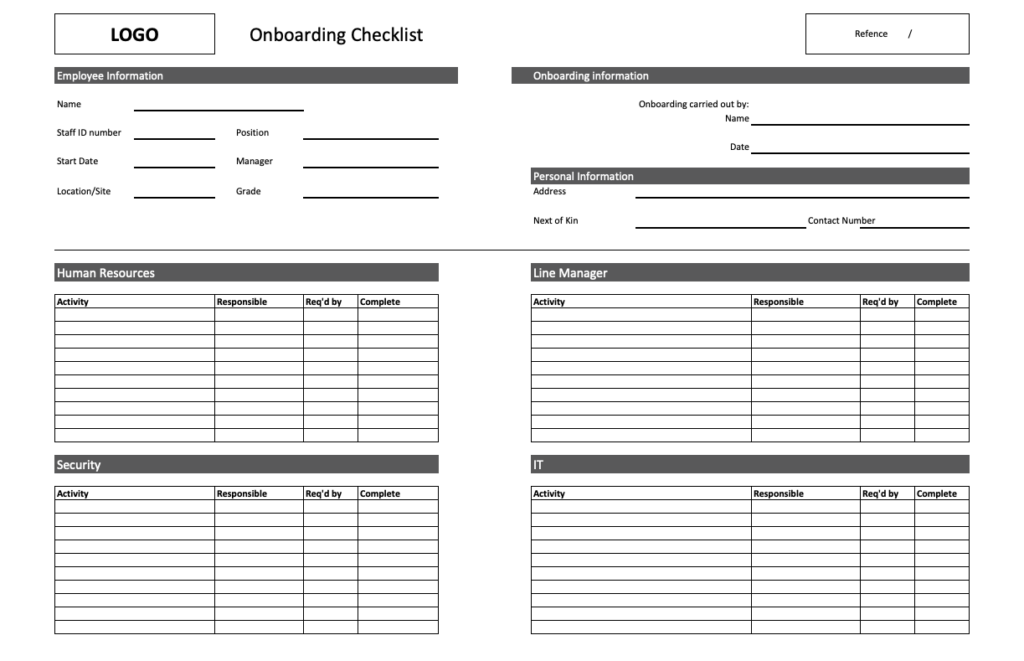
Onboarding checklist Example 1
In this example, we’ll demonstrate a traditional “form style” report.
Here’s what the finished result looks like:
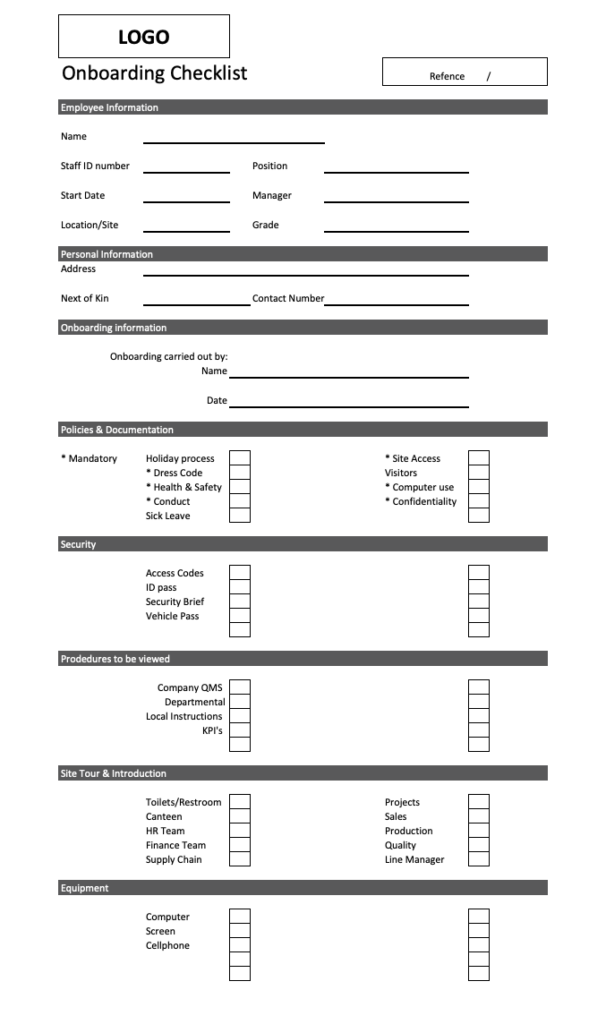
As you can see, it contains several sections:
Section 1 – Header
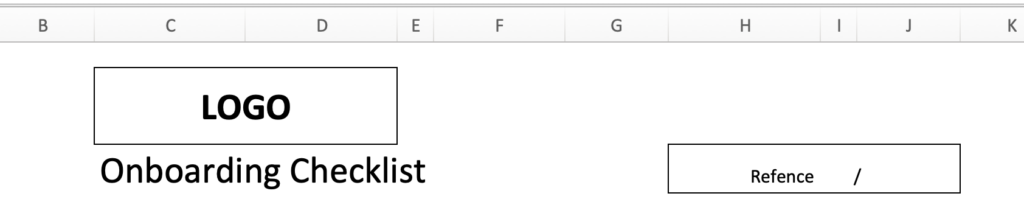
This section utilizes
- Merged cells to create a block for the logo
- Merged cells to create a place to capture the document reference details
Section 2 – Employee Information section
In this section, we use text and borders to create a capture section to record information about the employee – you can expand this to suit your organization.

(Note we use a merged cell (column c-j in our example, and apply a cell fill to it to create a section break.)
Section 3 Personal Information section
Similar to section 2, we now create an area to store details about the employee such as their address, next of kin, etc.
Section 4 Onboarding information
Similar to Section 2, we create a section that enables us to capture who co-ordinated the onboarding.
Section 5 Onboarding checklist
Section 5 uses a mixture of text and tick-boxes (we created this by merely resizing the column/row, allowing us to add borders, so the cell resembles a box.)
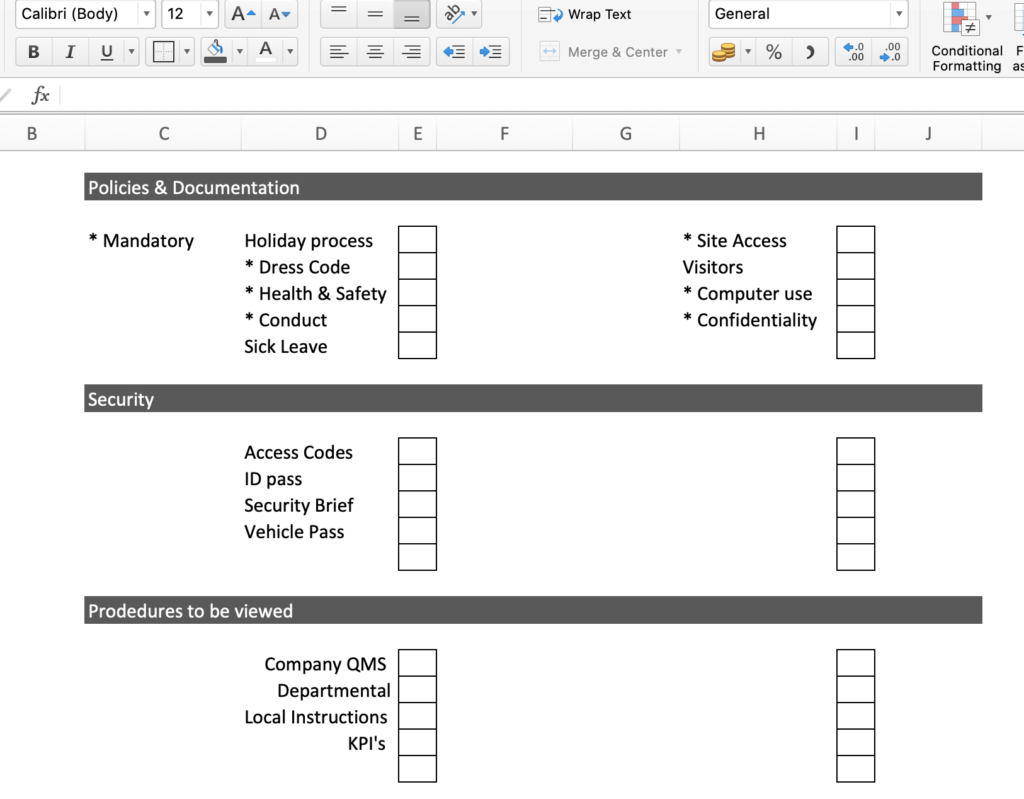
This section gets repeated so that we can group tasks together (in our example, we have several sections i.e.
- Policies
- Security
- Site tour
- etc
We’ve formatted the sheet so that we can have a left and right-hand set of tick boxes per group.
Next, we format the document so that it’ll print on one page.
Onboarding checklist Example 2
Example 2 is in a time-based format, i.e., what onboarding activities need to be done by when.
Here’s what the finished sheet looks like:

The template is split into two sections
- Section 1 – capturing information about the employee
- Section 2 – detailing the onboarding tasks
Section 1
First, we create a logo/reference section in the same way that we did, for example, 1.
Next, we create, using text and borders, sections where we can document information about the employee.
Rather than list these sections, we try and group them so that they fit neatly in the top half of the document.
Section 2
Next, we create four time-based sets of tick boxes/tasks.
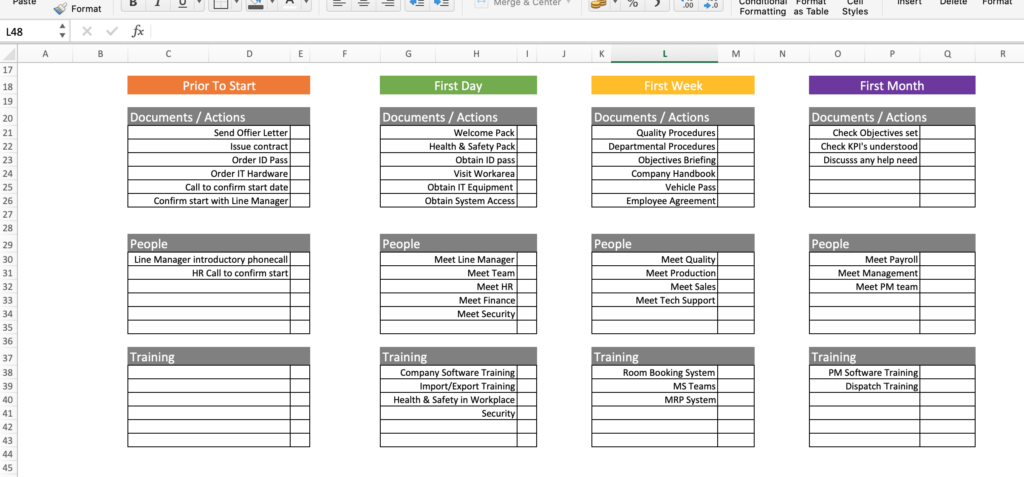
We use colors to differentiate each set.
Our four-time phases are:
- Prior to start
- First day
- First Week
- First Month
Again you can adjust these to fit your needs.
For each set, we split the tasks into three sections
- Documents/Actions
- People
- Training
We then use text and borders to create tick-boxes (similar to example 1).
We then format the document so that it fits on one page.
Onboarding checklist Example 3
In our third example, we opted to create an onboarding checklist that followed a departmental/functional layout (i.e., HR, Line Manager, Security, etc.).
Here’s what it looks like:
While this example uses a different color scheme, it follows similar principles to example 2. It contains two key sections
- Section 1 – capturing information about the employee
- Section 2 – detailing the onboarding tasks by function – each “function” has one “block” where we track
- The onboarding activity
- Who’s responsible for task closure
- When we need it done by
- A field to capture that the task is complete.
Section 1 is precisely the same as Section 1 from example 2 – we format the sheet (adjusting row heights and column widths) appropriately so that we can fit section 2 neatly underneath.
Section 2 – Onboarding activity
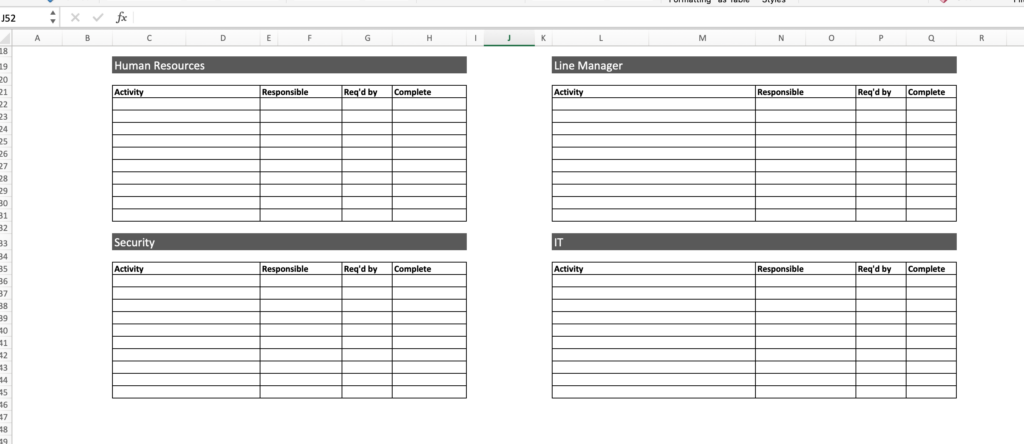
For this section, we have two tables that capture the information. They are created using: text, formatting (fill), borders) While you can experiment with adding more columns, we found that four columns were a good fit and allowed us to have two “blocks” next to each other.
If we think of these two tables as one “row,” we can cut and paste further “rows” depending on how many functions we want to track.
Why should you use an onboarding checklist?
As you can see from the above examples, checklists are useful tools that you can use to organize the task and enable you to verify that onboarding has been carried out correctly (thereby reducing mistakes or errors).
Without a checklist, you might:
- Forget tasks
- Fail to prioritize correctly.
- Not know when you’ve completed the task.
For the onboarding checklist to be effective, it needs to contain all the tasks that you are required to complete to finish the process successfully.
Having an onboarding checklist template for your organization means that everyone will undertake the task in the same way.
Summary
We hope you like this article and the three onboarding checklist examples we’ve shown.
Have some ideas on onboarding that you’d like to share? Perhaps you’ve developed your own checklist and have some tips/tricks you’d like to share?
We’d love your feedback – you can reach out to us on Twitter (@sanbustrain) or use the comments section below.
This article is part of our Human Resources Guide.